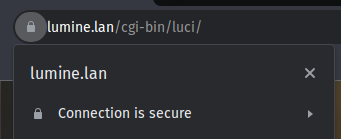
Custom CA in Caddy for HTTPS on LAN
Caddy automatically generates a self-signed certificate for HTTPS, and adds it to the trust store of the operating system. This is great for local development, but it’s not trusted when you access your website from another device on the same network.
However, we can generate our own CA and give it to Caddy, which would then automatically generate certificates signed by our CA.

Generating a CA
You are going to need easy-rsa installed on your system. You can install it using your package manager, or you can download it from the Github repository.
pacman -S easy-rsa
Create a directory
mkdir lan_ca
cd lan_ca
And initialize the CA
We are using the
nopassoption so that Caddy would be able to read it.
easyrsa init-pki
easyrsa build-ca nopass
It will ask you to input a Common Name. Choose anything you would be able to recognise. For this example, I am using lan_ca.
You can find the CA files in pki/ca.crt and pki/private/ca.key.
Keep this directory safe. Anyone with access to it will be able to issue certificates for any domain, and your browser will trust them, opening you up to MITM attacks.
Automatic certificates with Caddy
Now that we have our CA, we can use it in Caddy to automatically generate certificates for our websites.
First, copy the CA files to the Caddy directory.
cp lan_ca/pki/ca.crt /etc/caddy/lan_ca/ca.crt
cp lan_ca/pki/private/ca.key /etc/caddy/lan_ca/ca.key
Then, add the following to your Caddyfile.
{
	pki {
		ca lan_ca {
			name lan_ca

			root {
				cert /etc/caddy/lan_ca/ca.crt
				key /etc/caddy/lan_ca/ca.key
			}
		}
	}
}

(tls_lan_ca) {
	tls {
		issuer internal {
			ca lan_ca
		}
	}
}
Now you will be able to automatically generate certificates for your websites using import tls_lan_ca.
example.lan {
    import tls_lan_ca
    respond "https on a local domain"
}

192.168.1.5 {
    import tls_lan_ca
    respond "https without a domain"
}
Manually issuing certificates
You can also manually issue certificates, for use outside of Caddy.
For example, let’s issue a TLS certificate for example.lan
cd lan_ca
easyrsa --nopass build-server-full "example.lan"
You can find the certificate in pki/issued/example.lan.crt and the key in pki/private/example.lan.key.
Installing the CA
Now that we have our CA, we need to install it on our devices, so that browsers would trust the certificates issued by it.
Browser
The easiest way to install the CA is to import it in your browser. This will only work for the browser you are importing it in.
In Firefox, you can do this by going to Preferences > Privacy & Security > Certificates > View Certificates > Authorities > Import.
In Chromium-based browsers, you can do this by going to Settings > Privacy and security > Security > Manage certificates > Authorities > Import.
Windows
On Windows, you can install the CA by double-clicking on the ca.crt file, and clicking on “Install Certificate”. Then, choose “Local Machine” and “Trusted Root Certification Authorities”.
Android
On Android, you can install the CA by going to Settings > Security > More security settings > Encryption & credentials > Install a certificate > CA certificate. Then, choose the ca.crt file.
This is going to cause a warning to appear in your notifications, saying Network may be monitored. This is normal, as you are installing a custom CA. It is safe to ignore this warning as long as you keep the CA key safe.
There are several ways to avoid this warning:
Linux
Depending on your distribution and/or DE, you might be able to install the CA by double-clicking on the ca.crt file, and clicking “Import”.
Alternatively, you can install it system-wide from the command line.
- Arch-based
sudo trust anchor --store ca.crt
- Debian-based
sudo cp ca.crt /usr/local/share/ca-certificates/lan_ca.crt
sudo update-ca-certificates
- Fedora/RHEL
sudo cp ca.crt /etc/pki/ca-trust/source/anchors/lan_ca.crt
sudo update-ca-trust
go home · all posts